Plesk is a popular website control panel. It makes managing your website easy. Although it is easy to install, going through our tutorial will be very helpful and most likely save you time.
Before proceeding with the installation, we recommend using the correct hostname.
What are the requirements?
- Fresh Ubuntu, RockyLinux, or AlmaLinux OS installed on your VPS/Server.
How to install Plesk on Linux?
Step 1: Log in to your server via an SSH Client with root permissions.
Then enter this command:
sh <(curl https://autoinstall.plesk.com/one-click-installer || wget -O - https://autoinstall.plesk.com/one-click-installer)
The installation will begin and may take between 5 and 10 minutes. If it shows a hostname-related error, do not quit the installation. Sometimes Plesk only shows warnings and provides you with instructions on how to resolve them.
Once Plesk is installed, it will display a congratulatory message within your Plesk control panel and present you with an URL.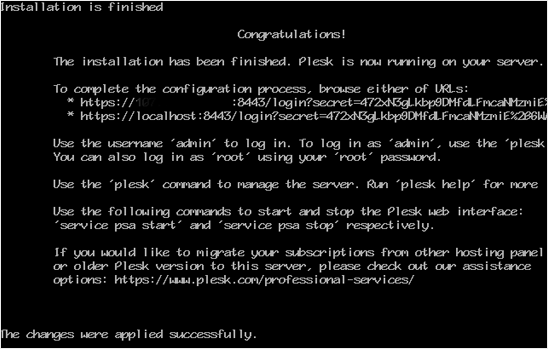
Please copy the entire URL provided by Plesk and open it in the browser. If the URL does not work, open a port in your firewall. You can check it by disabling the firewall and then accessing the URL. If it works, it means you would need to open a Plesk port in the firewall.
Step 2: When asked to accept cookies, do so and enter your name and email address in Contact Information.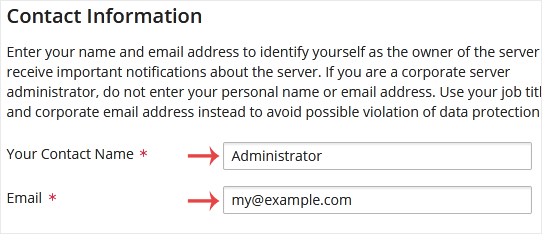
Step 3: In the password field, enter your password or generate a new one now. However, make sure that you store it in a safe place.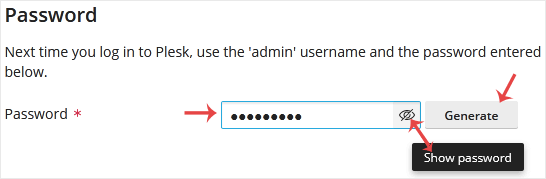
Step 4: Under the License section, should you have a license key, enter your Plesk license key or use a trial license by selecting a full-featured trial license.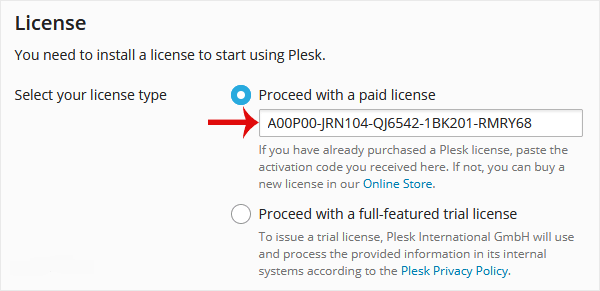
Final Step: Scroll down to the end of the page, read and accept the End-User License Agreement. Click on Enter Plesk.

Congratulations, you have successfully installed Plesk. You can now access your Plesk administrator area using root login details or the admin user name with the password you set in step three.
